We have a wood stove and a fireplace, so we need wood! The challenge is storing wood since it has a few specific requirements:
- it needs to be kept dry
- it need to breath so lots of ventilation is necessary
- it needs to be far enough from the house that bugs living in the wood aren’t enticed to move to the house
- it needs to be close enough that it’s accessible in the winter without trudging through the snow with a heavy load of wood for the fire
- 1 cord of wood weighs someplace around 3,000 pounds, so the shed need to support considerable weight.
Calculating our wood consumption, we really need a 3 cord woodshed at a minimum to house wood for a single winter. Hopefully it’ll be a little extra, but based on last winter’s burn rate, 3 cords should do it.
Selecting the Location
Originally, we were going to place the woodshed outside the side door next to the rose garden. However, after marking out the proposed site, we realized it would be the first thing seen when pulling into the driveway and would block the sight-line to the house. Surveying the area around the house, a location at the back next to the driveway and directly across from the garage door was identified. The only problem was the land was at an angle – it was not even in the same country as flat.
Building the Foundation
Since we don’t have access to large land-moving equipment such as a bobcat, we were faced with two options: move a very large amount of rock and root infested dirt by hand or level the foundation using “alternate means”. We chose alternate means.
The foundation consists of 6 concrete deck footings and 3 1″ thick pavers spaced into a 12′ by 6′ 3×3 grid. The three pavers are fully leveled relative to each other but the concrete footings are individually leveled but are NOT leveled relative to each other or the pavers. They essentially follow the contour of the ground.
The actual woodshed is supported on this foundation by 3 12′ 4×4 pressure treated beams with 4×4 poles leveling them on top of the concrete footings. The 4x4s rest directly on the pavers.
This arrangement provides a level foundation without having to level the ground since the leveling is accomplished using the length of the 4×4 poles.
Weight Calculations
With this arrangement, the maximum span of a 4×4 unsupported is about 5.5′ and the entire weight is distributed across 6 of these spans. This means each span should be able to support 1,500 pounds which is well within the expected load of a 4×4 beam. Additionally, on top of this 4×4 base is a series of floor joists consisting of 2x6s so the weight is thoroughly distributed across the entire structure and the only real point of concern is the 6 vertical poles.
The longest pole is still under 1.5 feet and a 4×4 is generally rated at about 17,000 lbs at 3′ long so I guess there isn’t really an issue there. So what about the ground itself?
The footings are concrete, sitting on a compacted dirt, sand, and pea gravel bed in a hole. The footings are about 12″x12″ so they spread the weight out over the entire area. If we use a high number for the weight of 15,000, we end up with 1,666 lbs per ground contact point. With a 12″x12″ of ground contact, we have 144 square inches of contact which translates into 11.5 pounds/square inch. MAX which the ground should be able to support (that 1,500/sqft load is the number used for sand) and we have a big safety margin in here as well.
The Deck
The deck (floor) is constructed as a 2×6 box 7 2×6 joists (2 make up the ends of the box) with then covered with 2×4 decking spaced 3/4″ apart. This is the main weight-bearing structure of the woodshed.
Honestly, the deck and up are based on plans from myoutdoorplans.com with a number of minor modifications and adaptations, and I don’t have incremental pictures of the progress.
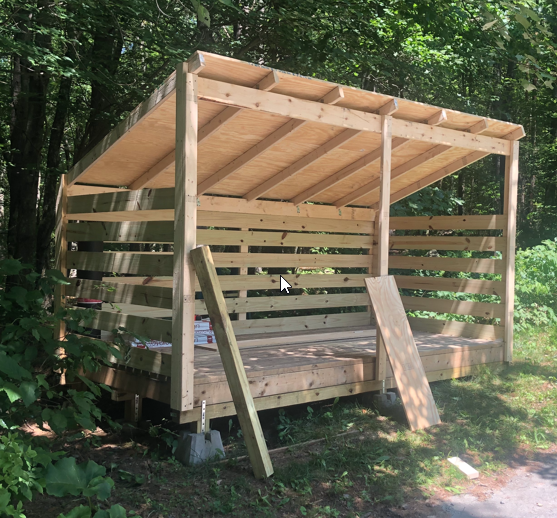
Top Structure
The top structure is all 2x4s, 2x6s, and pressure treated 1×6 slats.
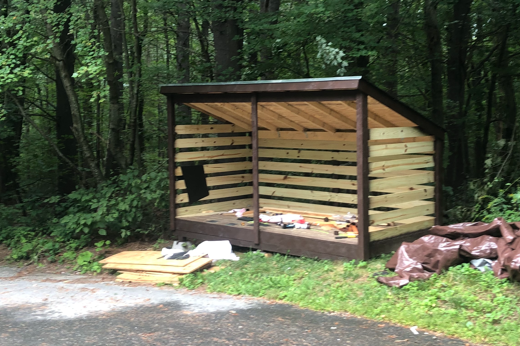
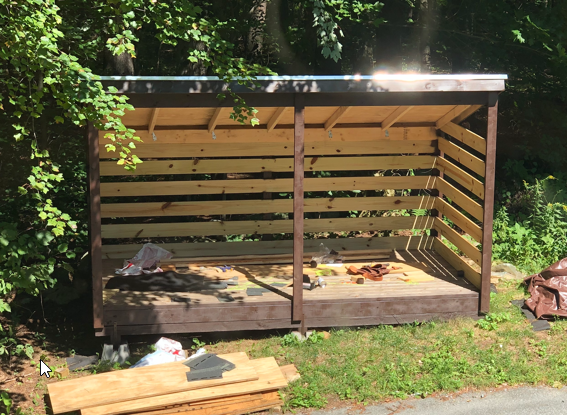
The Finished Woodshed
It’s painted with Rustoleum espresso brown spray paint. The spray paint is ideal for sealing and finishing rough-wood structures since it gets into all the rough surfaces and seals them up quite effectively.
Next step is to get it filled with wood!