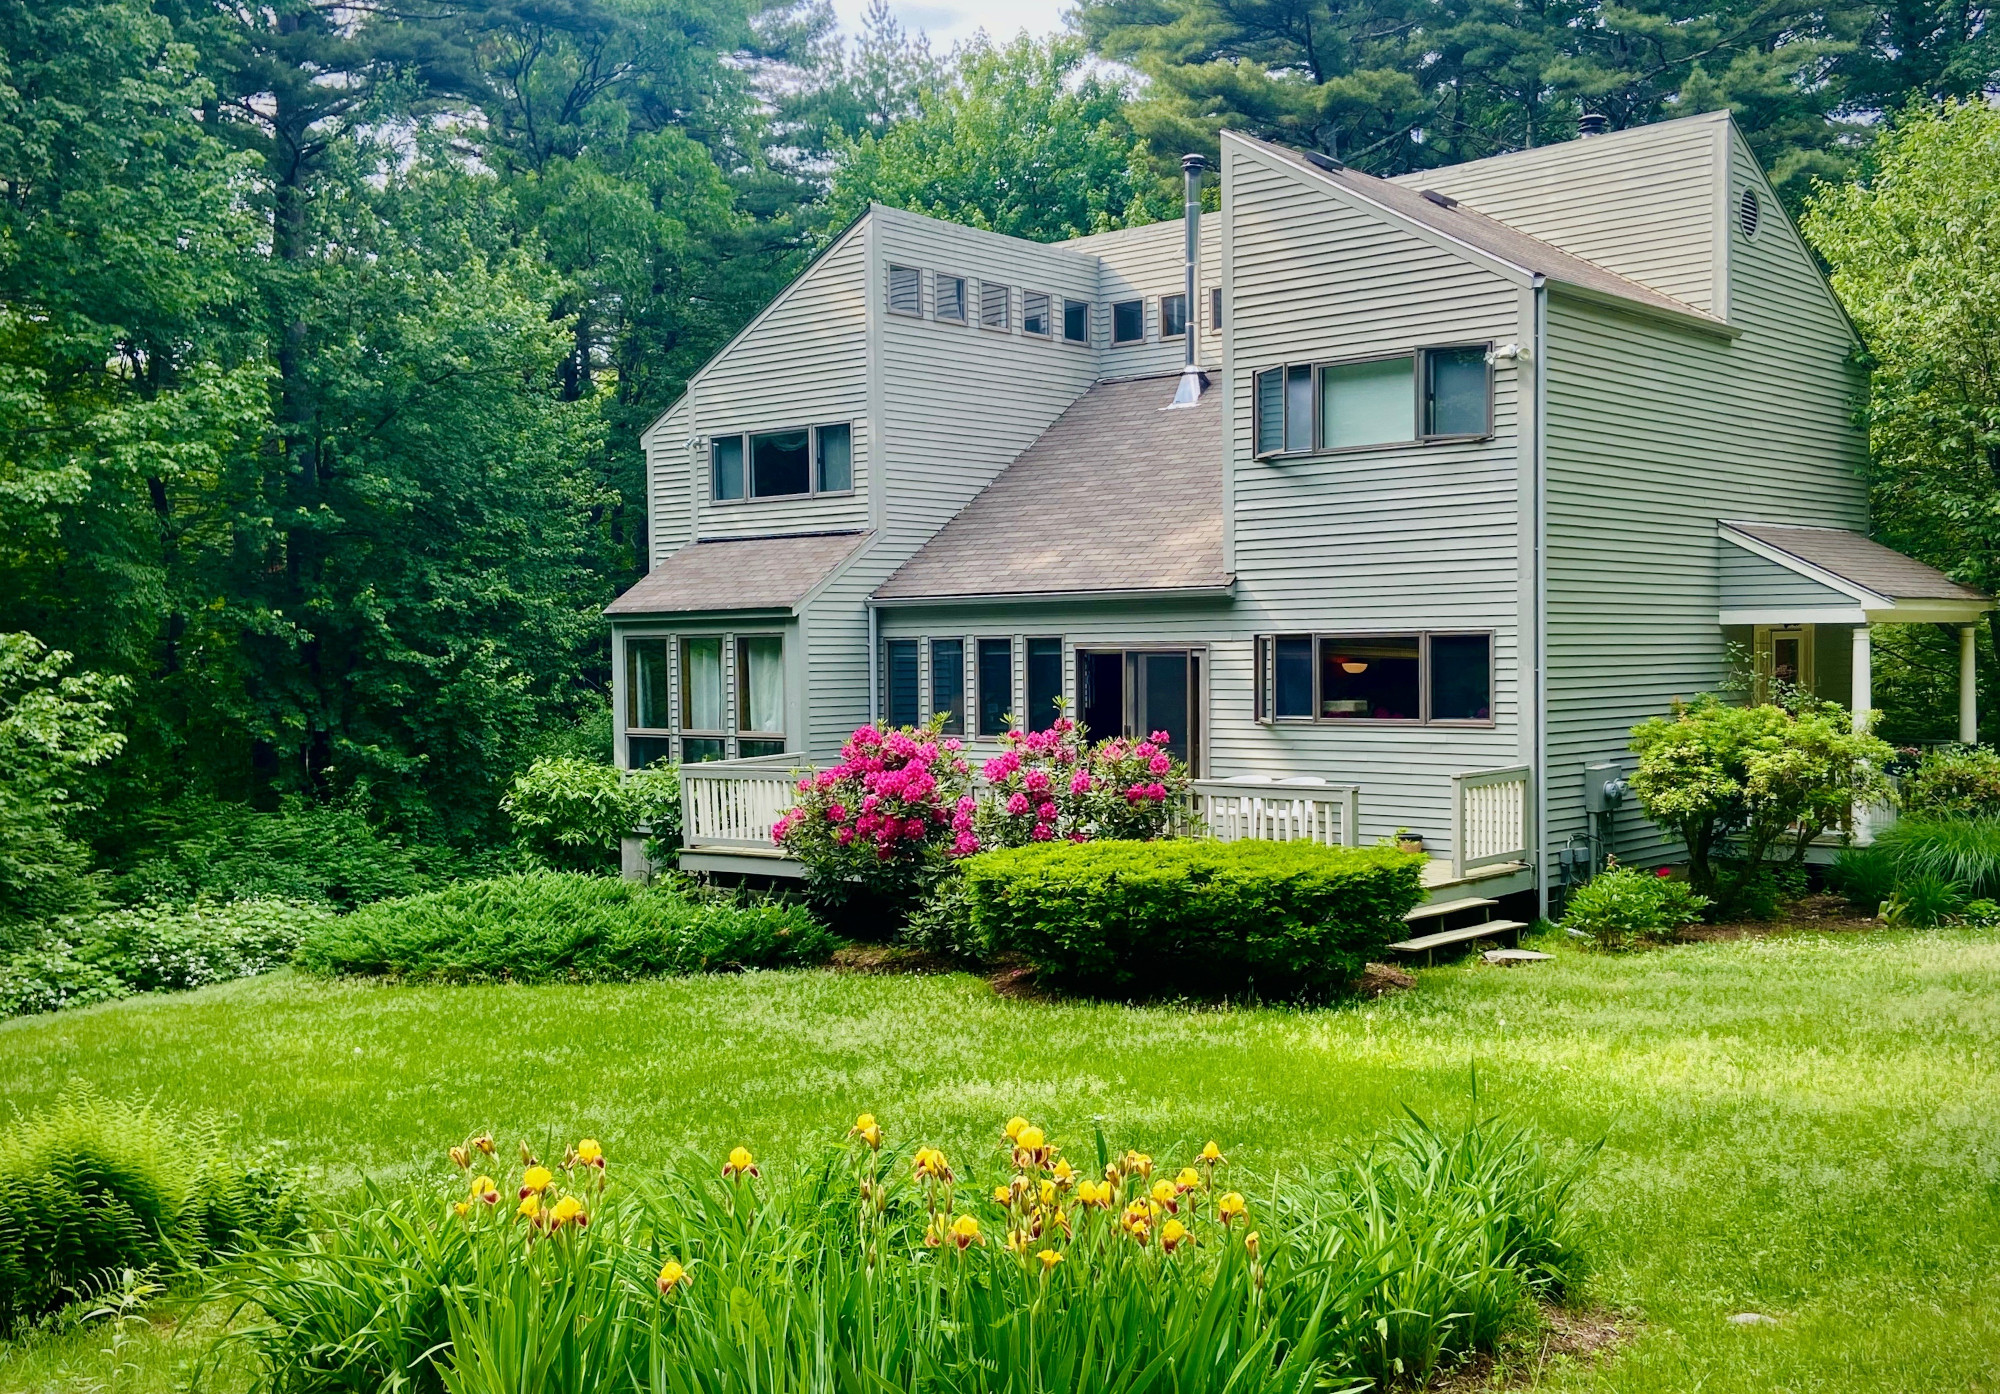
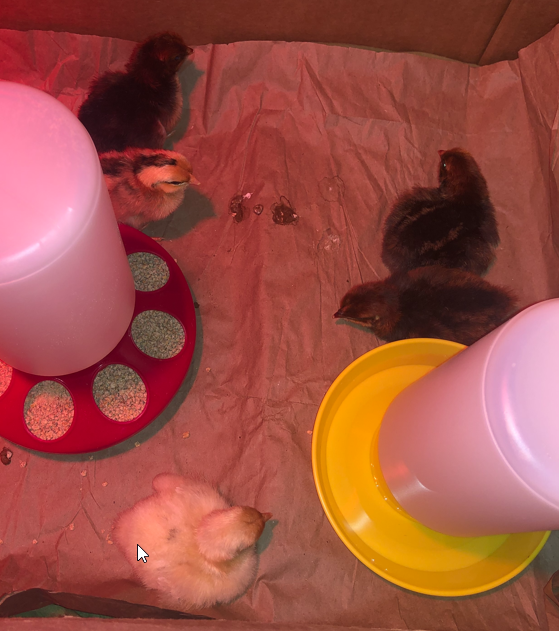
So we got chickens, but as usual we did things in the wrong order. We got the chickens before we had a coop. Yes, they were chicks but chicken coops take time to build, especially when you want a permanent and pretty coop as a new out-building in our garden.
So, a coop needed to exist. After looking online for ideas, we started designing. This was the first challenge – we weren’t exactly sure about what we wanted but we couldn’t put off getting started any longer.
To facilitate the design (and let my not-so-inner geek loose), I modeled every part in freeCAD as a parametric model. We finally settled on this:
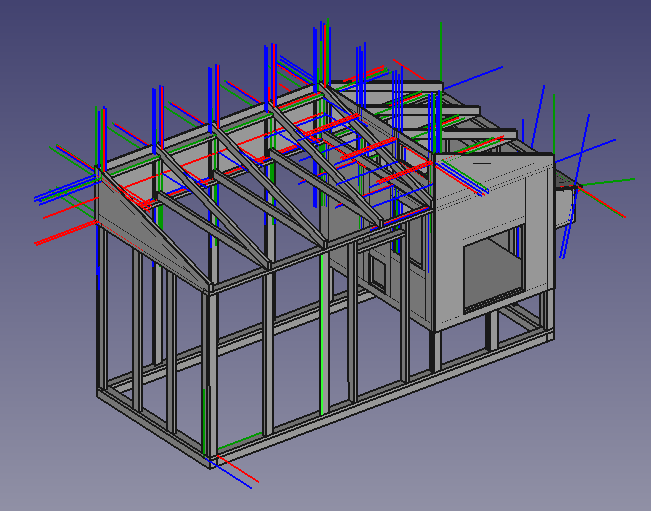
And so I began construction.
The Foundation
To create a truly secure chicken coop, the ground must be properly prepared. If it was a just a normal shed, all you’d have to do is level out the foundation. The easiest way is to just use concrete footings and 4x4s with some 4×4 spacers. This was the approach I used on the woodshed. 9 footings supporting 3 4×4 rails supporting 13 2×6 joists supporting a 2×4 floor. A chickencoop, however, doesn’t need (and probably shouldn’t have) a floor. The chickens want to scratch, dig, take dust baths, etc.
Additionally, a chicken coop needs to be secure against predators. Predators such as dogs, rats, foxes, snakes, rats, racoons, etc. A scary number of these dig – just look at all the dogs that dig under their fence just because. If they’re motivated by a meal, it’s a completely different level of problem! So, the ground isn’t safe.
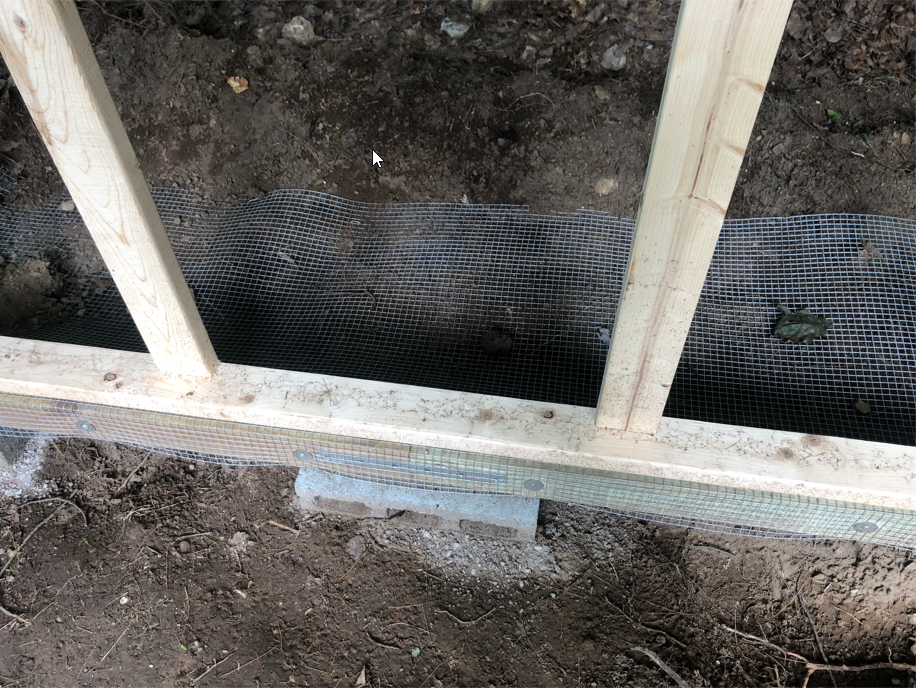
Fortunately, these predators tend to be rather direct – they go right up to the obstacle and then try and dig down. If they’re already standing on a barrier, they’ll be thwarted! Enter hardware cloth – using 1/2″, 19 gauge hardware cloth a few inches under the ground 2′ out from the foundation effectively blocks diggers from getting under the foundation. Since this much digging was already required, I went ahead and (mostly) leveled the site and used half-height cinder blocks (7 of them) to hold the 4×4 foundation.
Digging wasn’t fun – it was a lot of roots, and rocks, and the electronic dog fence……… but in the end, it was completed, the hardware cloth was laid (and wrapped around the 4x4s so it would be held down and extra secured by the wall footers). So now it’s time to start the framing.
Rough Framing
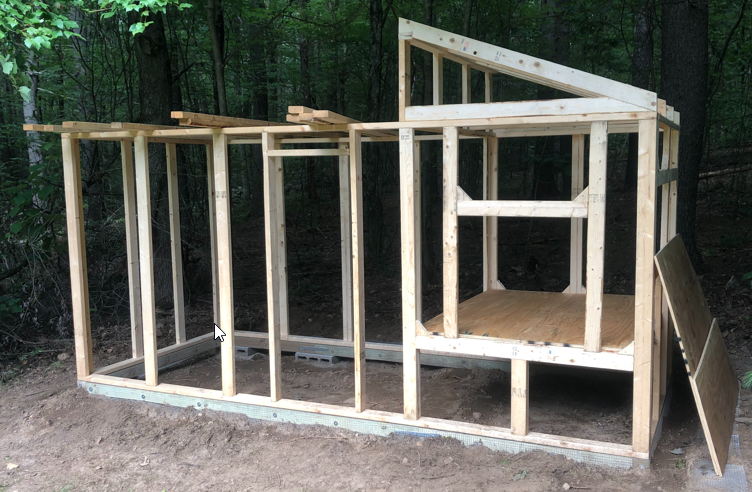
The rough wall framing was done in the garage, mostly in the evenings after work, and then moved outside in pieces. Each wall was constructed as a distinct unit with footer, studs, and header. The garage floor, while not perfectly flat, is better than any other surface available to square-up the framing. The assembly is entirely 2x4s and a combination of nails and screws.
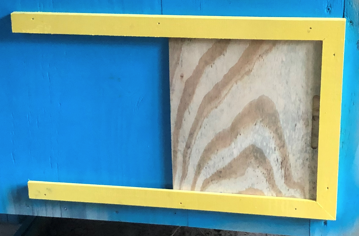
Coop Floor
The coop floor is 3/4″ plywood over 2×4 joists with supports under. It’s all stacked so no weight is resting on nails or screws (except the joists because it’s impractical otherwise). To facilitate cleaning, maintenance, and protect the plywood, the cheapest linoleum flooring available makes up the top layer. It’s held down with linoleum tape and pinned under the internal sheeting for extra security.
Roof and Initial Painting
The roof framing was constructed in the garage just like the framing. Both sections were constructed separately and then joined together and to the wall framing. The rafters were (mostly) spaced to sit directly above the wall studs to increase strength and reduce the load on the wall headers, since they’re just a single 2×4.
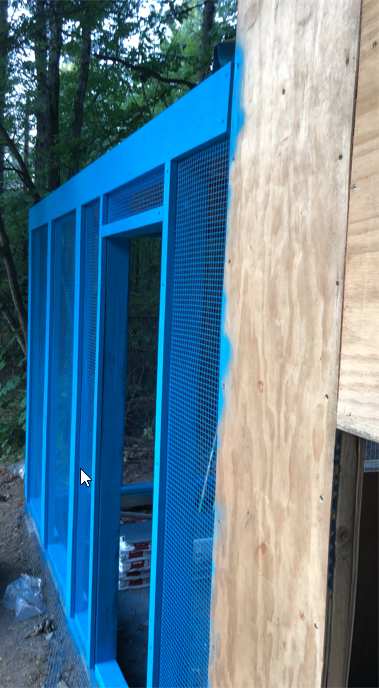
The wood structures that wouldn’t be covered by anything but hardware cloth were painted at this phase to ensure complete coverage and maximum sealing. The paint is just Rustoleum Oasis Blue spray-paint (perfect for getting into all those rough nooks and crannies in the un-sanded lumber).

Nest Box Framing
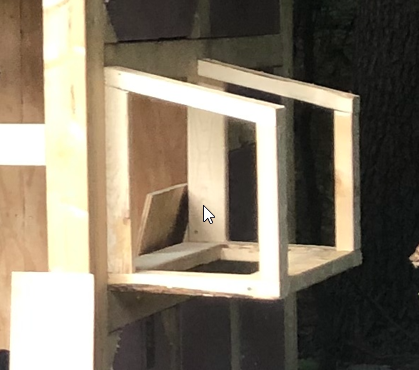
The nest box hangs off the side of the coop at the front where it’s easily accessed to retrieve eggs. It’s sized for 2 nests side-by-side separated by a thin plywood divider.
Sizing the box was tricky – it needs to be big enough for the chickens, but small enough that they feel “cozy”. I settled on a 12″x12″ size with a sloped roof to provide headroom. The front lip (if any) will be provided by a frame of sheeting on the inside.
Insulation
Since we’re in New England, retention of heat inside the coop is going to be critical – but our summers can be hot so keeping providing ventilation options is also important. Furthermore, humidity inside the coop can be a problem in the winter so year-round ventilation is a must – but how much?
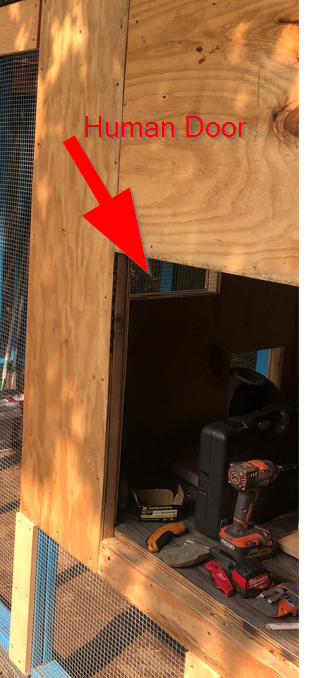
I settled on insulating the walls, leaving the inside unfinished (so the wood can act as a moisture buffer), and designing flexible openings. The “human door” to the coop proper, for example, is not hinged but interchangeable so I can create summer and winder doors to control ventilation based on season. None of this really matters at this point, I mention it to understand why I needed to install insulation in the walls.
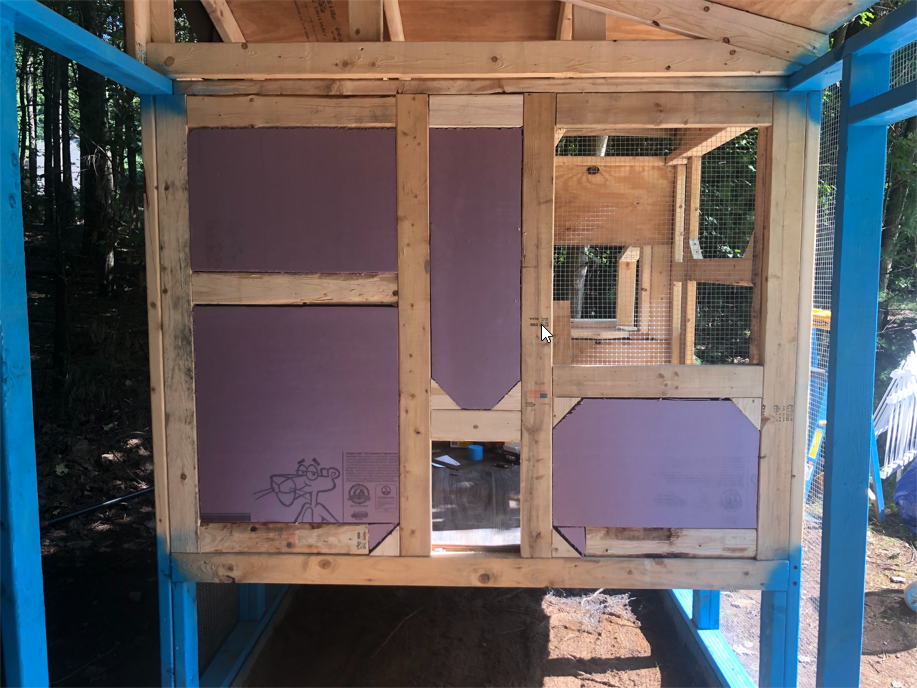
For insulation, I used 1.5″ extruded polystyrene insulation from Corning. With an R value about 7, it should provide a nice insulation boost over raw wood with hollow air spaces.
An Aside About Ventilation Openings
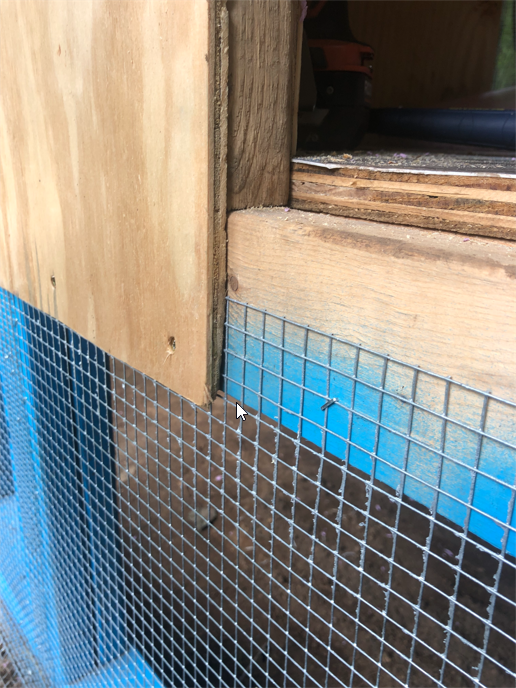
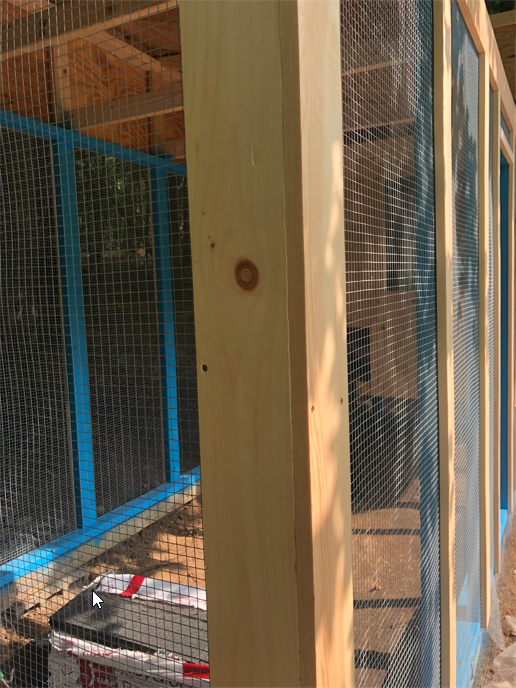
Just like predators dig to get under the foundation, they’ll try and rip through anything blocking ventilation openings. The same hardware cloth used in the ground is used to secure these openings. All openings in the coop or the run are secured by 1/2″ hardware cloth initially secured with staples but then sandwiched between sheeting and 2×4 framing to ensure it’s completely secure.
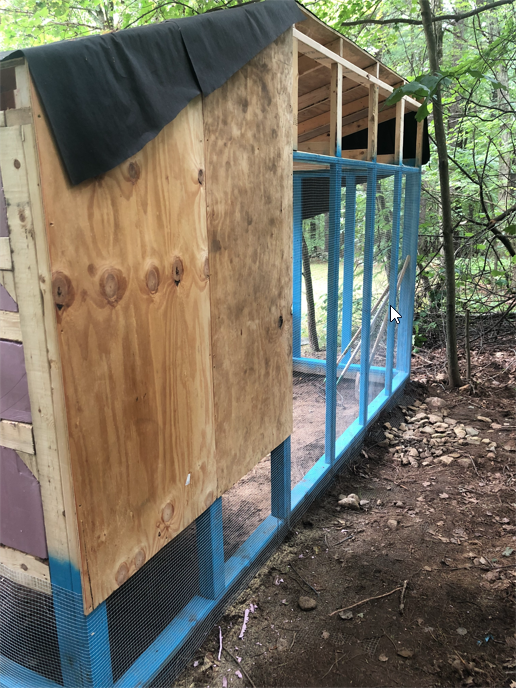
Exterior Sheeting
The exterior sheeting is the same as the internal sheeting – 11/32″ plywood. Thicker isn’t necessary since it’ll be covered with clapboards nailed directly into studs.
Cutting the sheeting was a challenge without a table saw. Aside from some rough-cuts done at Home Depot, all the cuts were done with a circular saw. Each cut was measured on the edge, a line snapped with a chalk line, and then cut on the ground.
The exception are the angled cuts on the roofs. Rather than measuring and trying to get it right on the ground, I mounted the boards full-length, snapped a line down the board, and cut it in-place. To ensure no damage to the roof sheets, I fine-tuned the depth setting on the circular saw with scrap wood so it cut exactly the thickness of the sheeting and no deeper.
The Great Trim Debate
The design of the coop calls for the hardware cloth to be secured between layers of wood. Every piece overlaps on the verticals in the run, but what should the face boards look like that fully secure the hardware cloth? There’s the cheap option which would preserve rustic the appearance of framing and the “luxury” option that would use actual face boards (instead of furring) to provide a nice square appearance. The face board used above the run sorta ended this debate because it looks so good! Actual trim boards it is.
The other piece of the debate is how wide should the trims be around the coop and the edges of the roof? The face board above the run is a 1×6 because it needs to close the gap but what about the trim where the width doesn’t serve a structural purpose? With such a small building, 4″ trim will probably look way too heavy (especially painted bright yellow). 1″ trim would just be a thin yellow line and how do you finish a corner with 1″ square boards? This really can’t be put off since the boards along the roof must be painted before the roof is shingled (they’re overlapped by the drop edge).
Initial Trimming
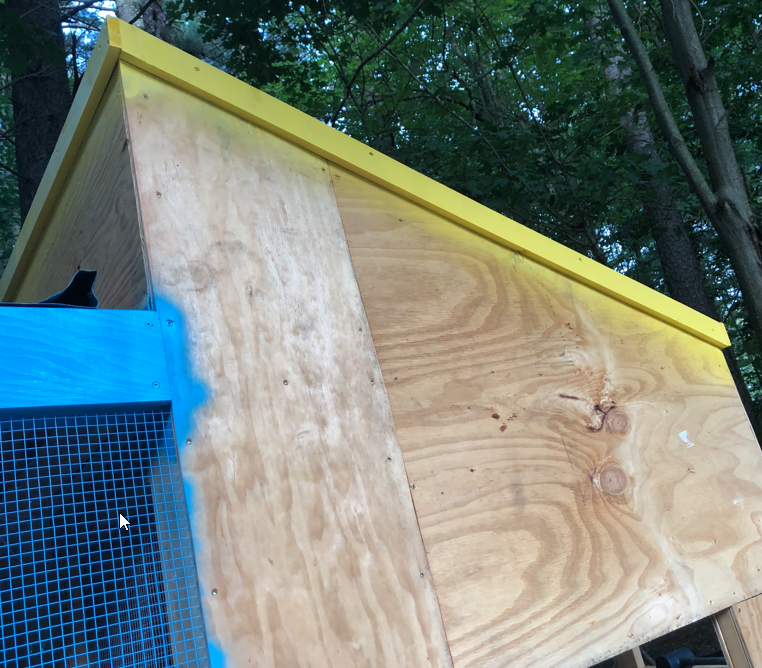
The roof trim needed to be installed prior to installing the roof – which is a high priority. So rather than trim out everything, the roof trim/face boards were installed. Along with the roof trim, the face boards were installed on all uprights (including boxing in the corners. This completely seals in the hardware cloth for maximum strength.
While the boards make it look nice, the screw holes were left un-filled to maintain a bit of a rustic/project feel to the finished product
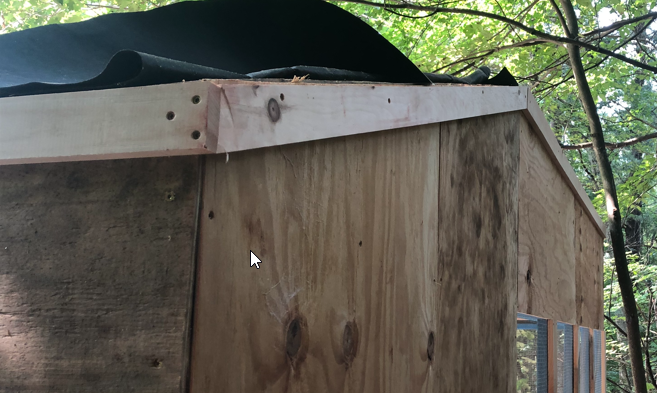
The diagonal edges of the roofs are perfect! Math does wonderful things – measure the rise, measure the length, do a little trigonometry, and then hope really hard that the miter saw angle markings are accurate. They are and if you look real close at the above picture you’ll see that the dark area on the end of the face board is actually the end of the horizontal, not the end of the piece going up the edge of the roof.
The “Human Door” into the Run
Securing the coop is pretty easy – just build a plug for the hole that is held in with sliding bolts. It doesn’t need to be opened frequently and swapping out a “summer door” with a “winter door” makes it easier to regulate temperature and ventilation inside. (more on this later). The human door into the coop is another story – it’s basically a screen door.
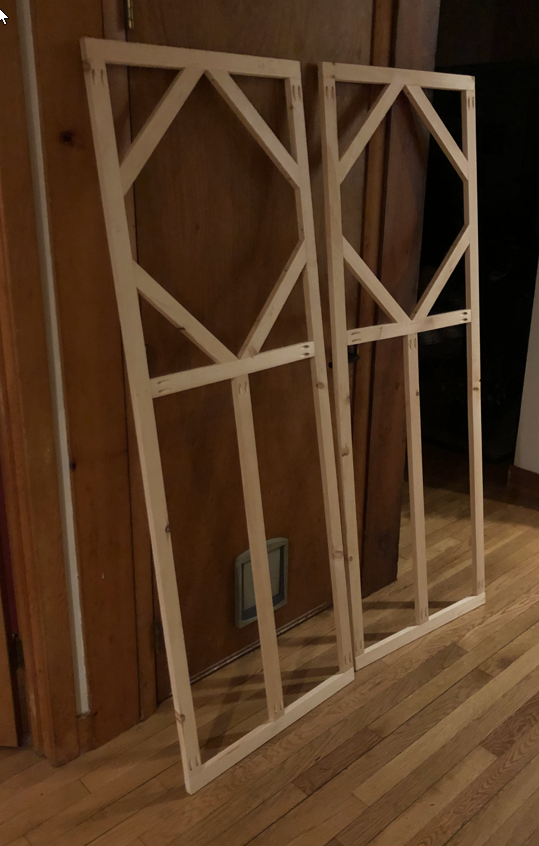
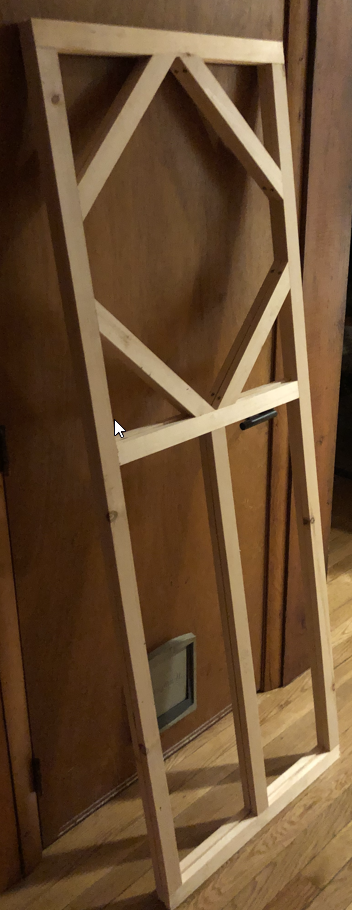
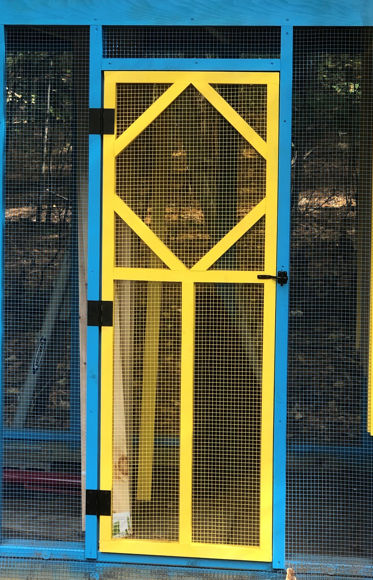
But, unlike a screen door, it’s a door into a “secured area”. Why go to all the bother of laying hardware cloth in the ground if I’m going to put a screen door in that a Chihuahua could run through. A better option was needed, so I made one.
Basically, it’s a screen door with hardware cloth instead of screen BUT it’s built like the rest of the coop – with the hardware cloth sandwiched between wood. And yes, they’ll be yellow to match the trim and provide a nice “pop” of color in the otherwise blue run.
The Roof
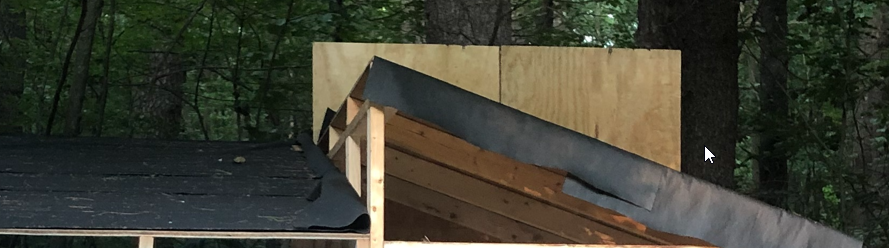
Not much to say about the roof – it’s a roof. You nail on singles and seal up the edges. The roof was done with metal drip-edge on all sides and step flashing where the two roofs meet.
Where the very top corner where the two roofs meet at the same level was a little tricky to cap. I ended up using a split shingle and sealant to cover all the cap rows of shingles. They all went toward that point and it ended up being about 4 layers of woven together shingles. Everything should be directing water out away from the underlayment so it should stay dry and secure until the roof needs to be replaced.
The nest-box door
The nest box door is constructed from a single piece of scrap plywood sheeting that was actually the cut-out when the opening was cut in the nest-box sheeting. It’s decorated with 1×2 trim boards which also provide structural strength and rigidity. The plywood was sanded down, cracks and other issues filled with wood filler, and painted. Separately the 1x2s were painted and then screwed into place.
The nest-box was also sanded, filled, and painted around the door opening. There’s too little space to do trim and siding, and it would look even more busy if I tried. The trim overlaps the gap so it provides plenty of sealing space and could have a rubber seal installed if additional sealing is required in the future.
The “People Door” to the Coop
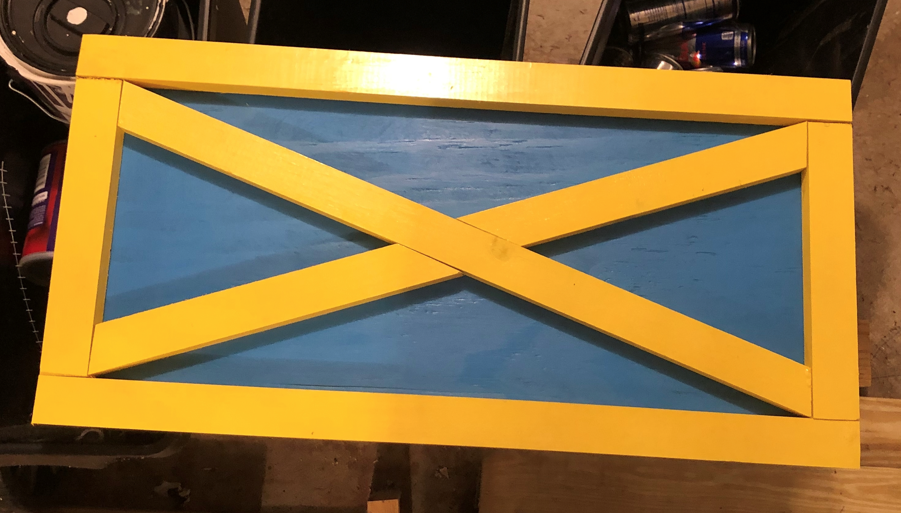
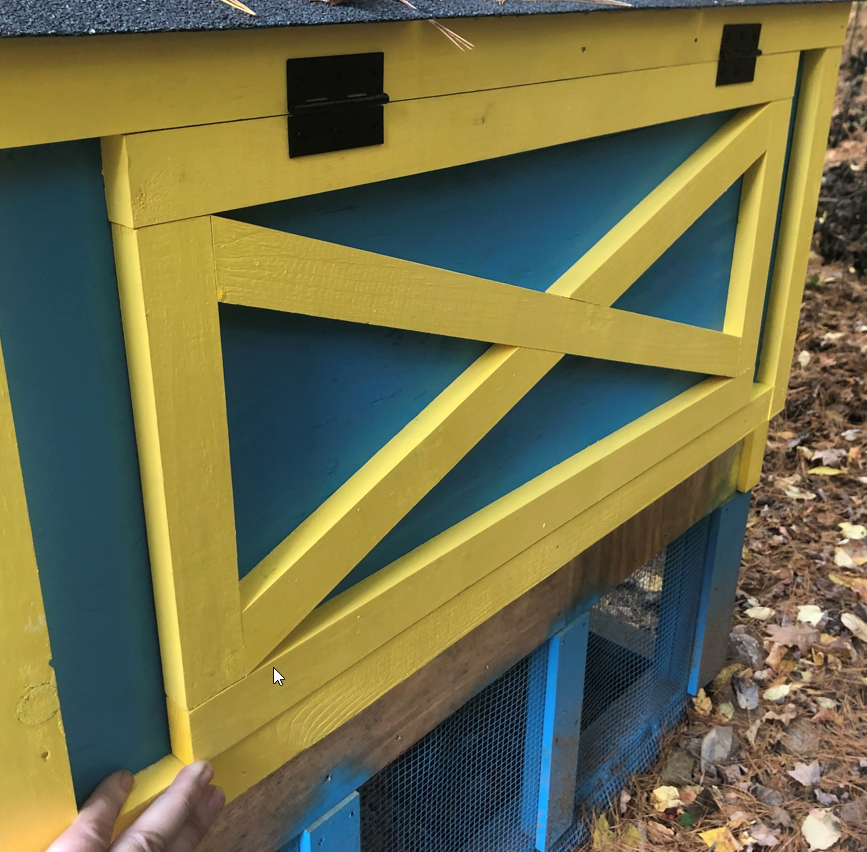
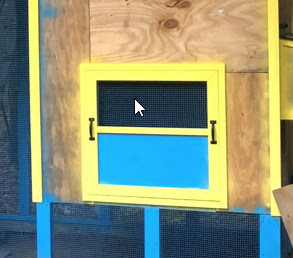
The big opening on the side of the coop is for humans to access the chicken’s space. It’s not meant to be accessed frequently, but it needs to be opened easily. Also, because it’s a major source of ventilation for the summer months, I didn’t want to commit to a single design instead opting for a removable door.
The door was build just like the wall with a window at the top. The framing is 2x2s (where the walls used 2x4s) but it has the same sheeting and insulation. The window is just like all the other windows and vents in the coop – 1/2″ hardware cloth secured between the studs and sheeting. Like the nest-box door, the trim attached to the door overlaps to cover the gap and help control drafts in the coop.
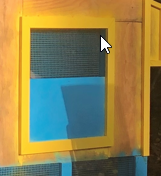
Unlike the nest box, the human door is also trimmed out. It does make a rather large yellow border, but I think it looks okay.
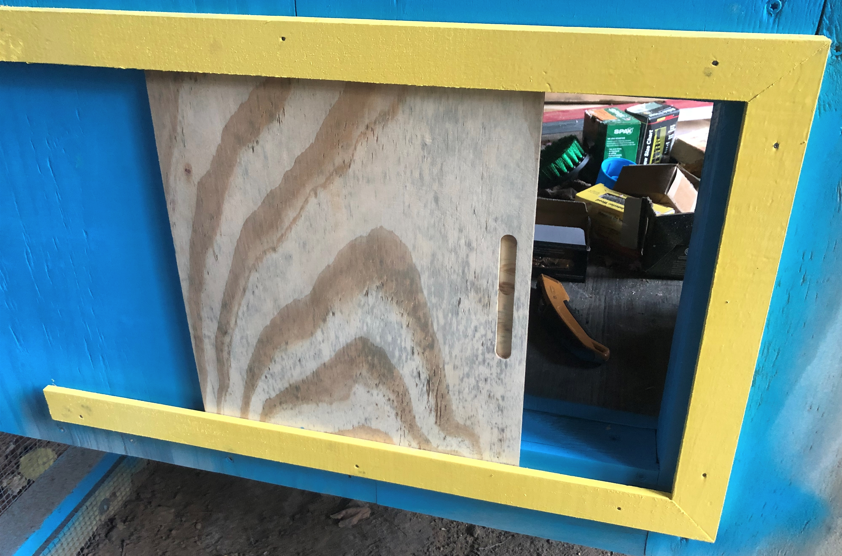
The Chicken Door
The chicken door is that teeny tiny little opening between the coop and the run. You can see it in the pictures above. This little door is how the chickens come and go from the coop!
The original plan was to have a sliding door that slid up but this had a couple of drawbacks:
- it required something to lock the door into the open position to prevent accidental closing
- it required something to lock it into the closed position
- the rails would interfere with trim around the window making it look extremely busy
As an alternative, I chose to go with a door that slides to the side instead of up. I considered a hinged door, but ultimately this door will be automated and a sliding door is easier and cleaner to automate.
Just like the nest box door, the sheeting was sanded and painted. The rails are made by 1×2″ trim with a 1/2″ grove cut with a router.

The door is a piece of 3/8″ plywood that was sanded on both sides. a groove was put in the door with a router to act as a handle. Ultimately, the door will be stained to match the siding in color, but for now it’s unfinished.
Interior Decorating
Now that the coop is fully enclosed, it’s time to decorate the chicken’s new home! Just like humans, they need some furniture to make them comfortable in their new condo.
Roosting Bars
These are basically the chicken equivalent of a couch and bed all rolled into one. For chickens, they prefer a wide and more flat roost than some other birds. They don’t really wrap their feet around the roost, but rater rest with their chest on it and their feet just stabilizing them. Because of this, I chose to use 2x4s for the roosting bars, after rounding the edges and sanding the surfaces.
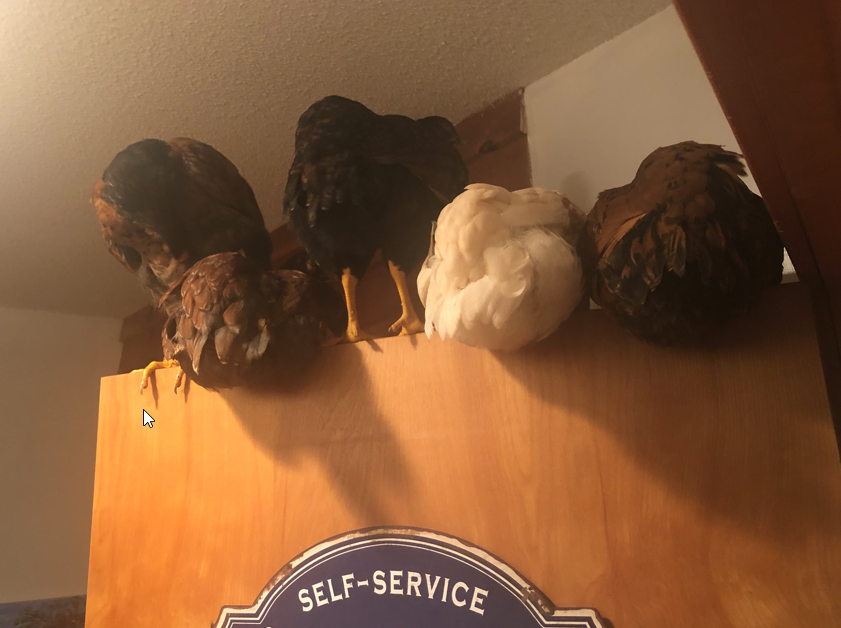
Chickens also like to be up high, and ours are no exception! In the laundry room, we have to make sure the door doesn’t stay open for more than a few seconds or they jump onto the top of the door. In the coop, we can give them exactly what they like – a roost bar up high. Actually, two bars – one lower and one higher.
Because the bars would definitely get in the way while cleaning the coop, I chose to make brackets for them to rest in on the walls instead of securing them directly. This means they’re easily removed for cleaning but are nice and secure when they’re installed. The brackets are just 2x4s with a 2×4 sized notch cut into them.
Poop Collection
Chickens poop – including while they sleep. In fact, most of their pooping in the coop should be while they’re sleeping. To try and keep things easier to manage and keep clean, I installed a board under the roost bars to catch their poop and keep it out of the bedding.
Very impressive .
Appreciate all the explanations — I learned a lot and certainly have a new appreciation for chicken coops!